Schedule Combined Class Sections
This overview explains how to group together basic, non-component classes using Curriculum Management's combine-sections functionality. (Note that the course type reflected in the course catalog determines if a course is a multiple-component course, or if it is a basic, non-component course.)
Building a Standard Combined Section
A Standard Combination is a combination that must be recreated semester to semester, meaning the combined class sections do not remain paired. This combination requires Permanent Combination to be deselected, and Skip Mtg Pattern & Instr Edit to be selected. Selecting the Skip Mtg Pattern & Instr Edit check box allows you to group class sections, but allows you to select different meeting days, meeting times, or instructors for the sections.
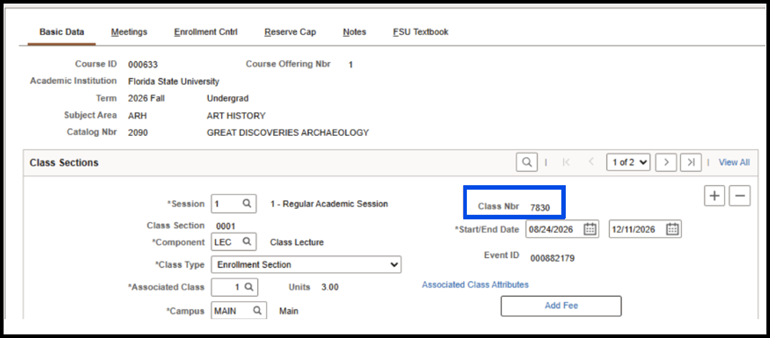
1. Go to Main Menu > Curriculum Management > Schedule New Course > Basic Data tab and build the first class section.
2. Switch to Main Menu > Curriculum Management > Maintain Schedule of Classes > Basic Data tab and build the second (third, fourth, etc.) class section.
3. While in Maintain Schedule of Classes, if the combined sections' meeting patterns differ, or an additional instructor is required, use the Meetings tab to schedule meeting times.
4. Click the Enrollment Cntrl tab. For each section, provide an enrollment capacity value.
5. Write down the Class Nbr values for each section you wish to combine.
6. Next, combine the sections on the Combined Sections Table by navigating to: Main Menu > Curriculum Management > Combined Sections Table.
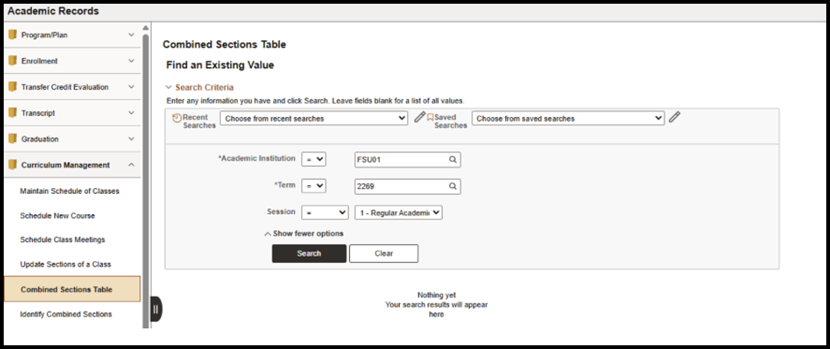
7. When the Search interface appears, provide values for the Academic Institution, Term, and Session fields and click Search. The Combined Sections Table appears.
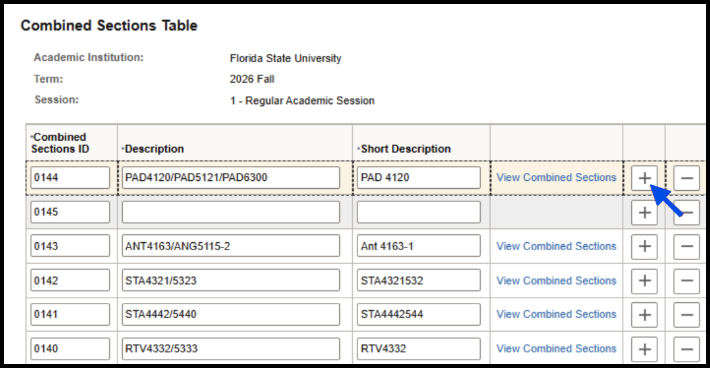
8. Click the Plus (+) button to create a new row.
9. In the Description column's field, type the description for the combined section.
10. In the Short Description column's field, type the short description for the combined section.
11. Click Save. The View Combined Sections link becomes active.
12. Click the link, and the Identify Combined Sections interface appears.
13. Select the Skip Mtg Pattern & Instr Edit check box.
14. At the top of the Identify Combined Sections window in the Combination Type drop down box, select the appropriate combination type.
- Both: Choose if the combination type is across course prefix areas and also within course prefix areas, i.e. ARH 4000, ARH 5000, CLA 4000, and CLA 5000)
- Cross Subject: Choose if the combination type crosses course prefix areas, i.e., ARH and CLA.
- Within Subject: Choose if the combination type is within a course prefix area, i.e., all sections are CLA only.
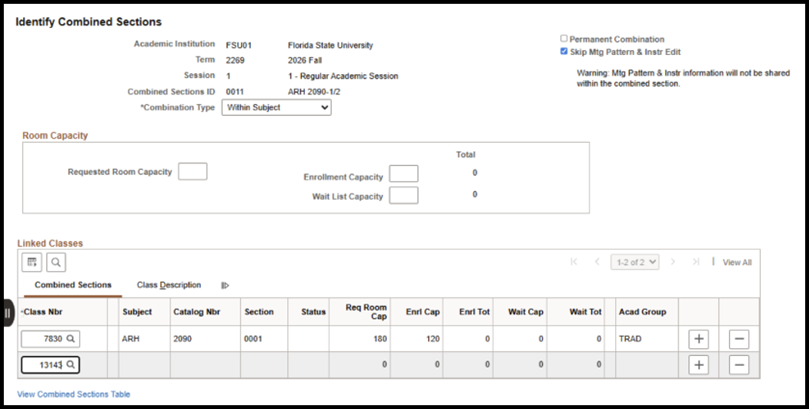
15. In the Enrollment Capacity field, provide a value for the total enrollment capacity. (Note: Sections will appear closed for enrollment if this number is not greater than the current combined enrollment or the combined enrollment caps that auto-populate after the sections are added based on what was input in previous steps.)
16. In the Class Nbr field, type the class number that you wrote down when you created the class.
17. Click the Plus (+) button at the end of the row and type the other class number you wrote down when you created the second class and click Save. The classes are now combined for only the current semester.
Permanent Combinations
If you need a Permanent Combination, please contact EMT-Academic-Scheduling@fsu.edu for assistance.