Establish Enrollment Controls
Student Central allows you more flexibility in how you display a class's enrollment status. You can choose from Active, Cancelled Section, Stop Further Enrollment, and Tentative Section.
Navigation
Main Menu > Curriculum Management > Maintain Schedule of Classes > Enrollment Cntrl Tab
How to Establish Enrollment Controls
1. In the Class Status drop down box, select a status. To open the class to enrollment, select Active.
2. In the Enrollment Capacity field, type a numeric value for the course capacity. This value represents the maximum number of students who can enroll.
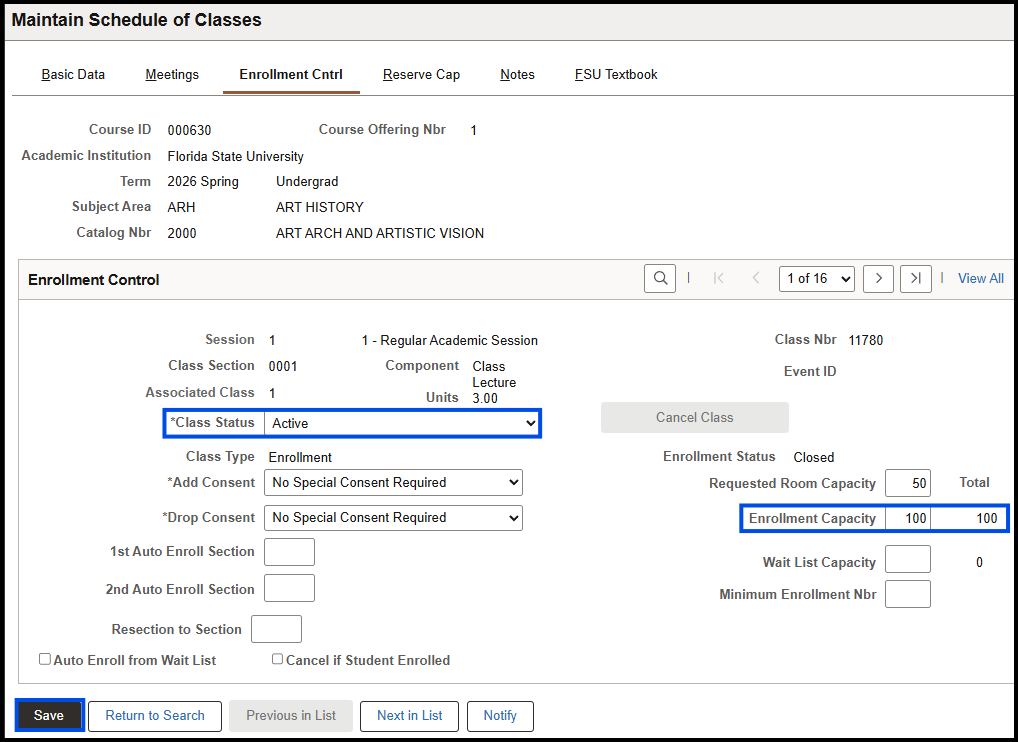
3. Click Save.
4. Determine if the Add Consent and Drop Consent field values are accurate. The system defaults to No Consent indicating that no instructor or departmental consent is required for students to enroll.
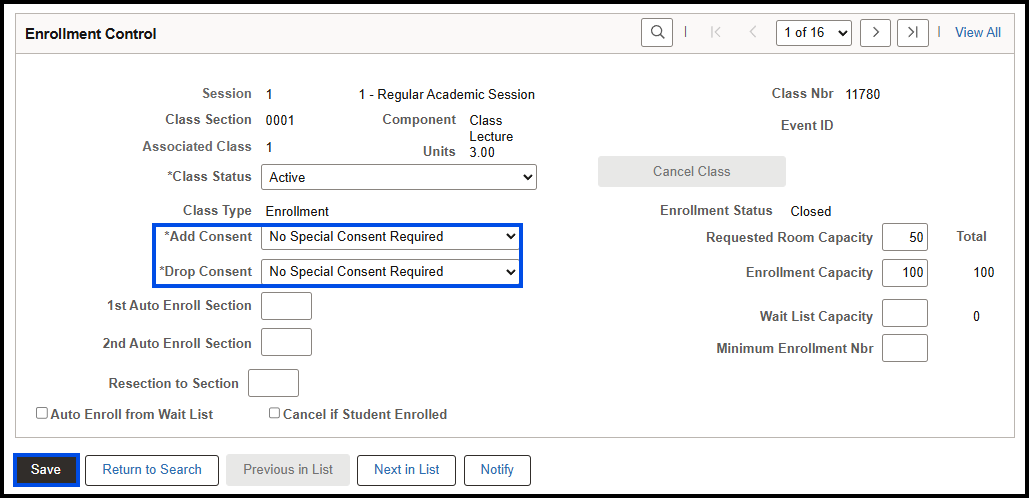
5. If student-specific permission is required for a student or students to add or drop the class, select either Dept Cnsnt or Inst Cnsnt from the appropriate Add or Drop Consent drop box.
6. Click Save.
7. Click the Basic Data tab.
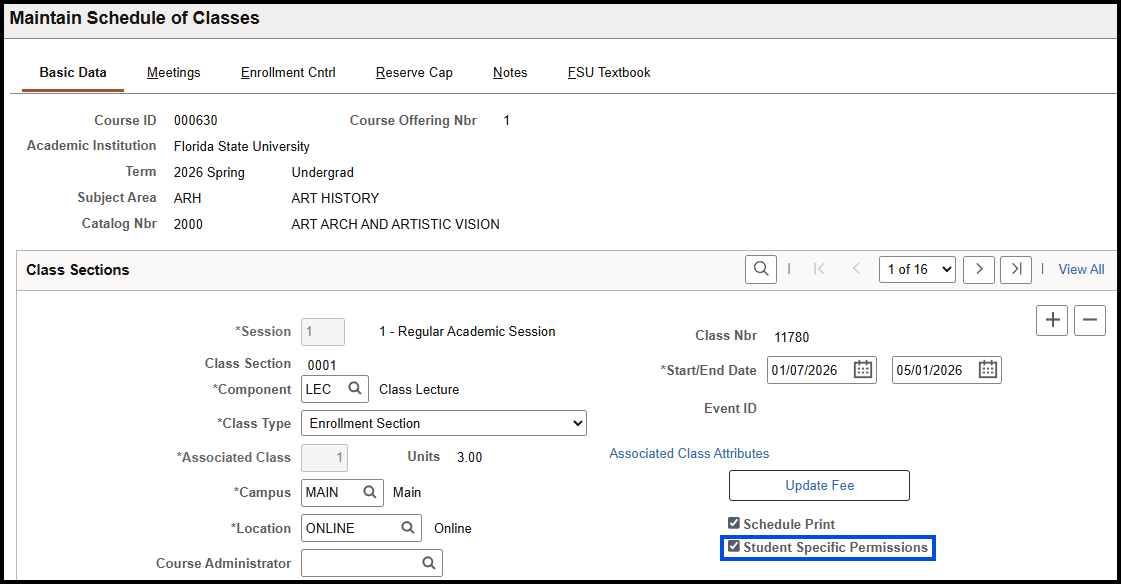
8. Select the Student Specific Permission check box.
9. Click Save.
Note: The Enrollment Cntrl tab's Auto Enroll/Wait List features display as an option, but they are not currently functional.
How to Create a Tentative Section, Halt Enrollment on an Active Class Section, and Cancel a Section with Enrollment
Create a Tentative Section
- Creating a tentative section of a class allows you to work with reserve cap sequences or groups without students being able to enroll in the class section
1. In the Class Status drop down box, choose Tentative Section.
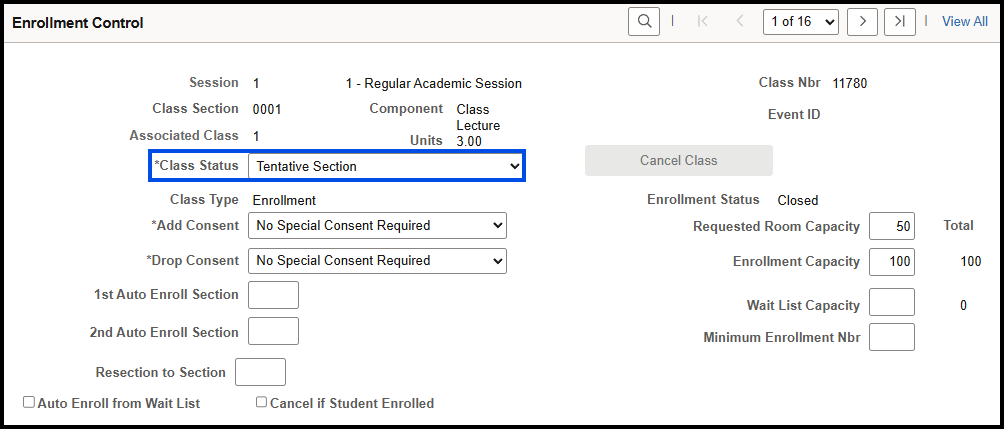
2. Click Save. Note that the Enrollment Status field now reflects a status of Closed. Thus, while the course has an enrollment capacity assigned, students can't enroll.
Halt Enrollment on an Active Section
- If enrollment in an active class section must be halted . . .
1. In the Class Status drop down box, select Stop Further Enrollment.
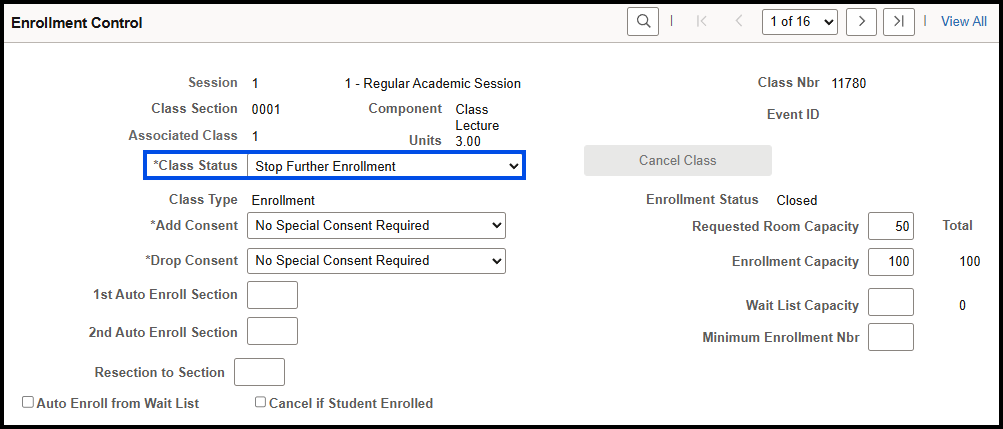
2. Click Save.
Cancel a Section with Enrollment
- To cancel the class after students enrolled in it . . .
1. Select the Cancel if Student Enrolled check box.
2. Then, in the Class Status drop down box, choose Cancelled Section.
3. Click the Cancel Class button.
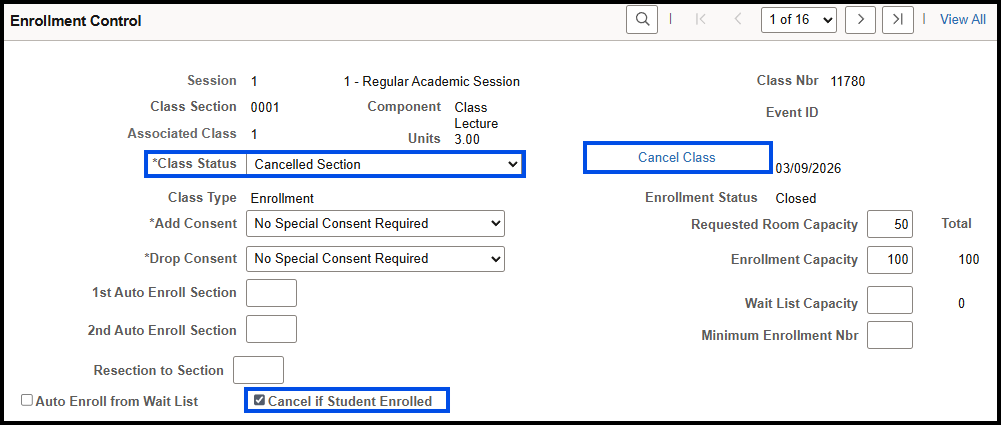
The Enrollment Status field now has a value of Closed. And the Total column reflects a value of 0.

4. Click Save.