Create Enrollment Permissions
You can give specific students permission to enroll in classes that require departmental or instructor consent. Two types of permissions are available:
- General (any student can use the permission)
- Student Specific
General Permissions
1. If you haven't already done so, navigate to Curriculum Management > Maintain Schedule of Classes and search for the class for which you want to add general student permission.
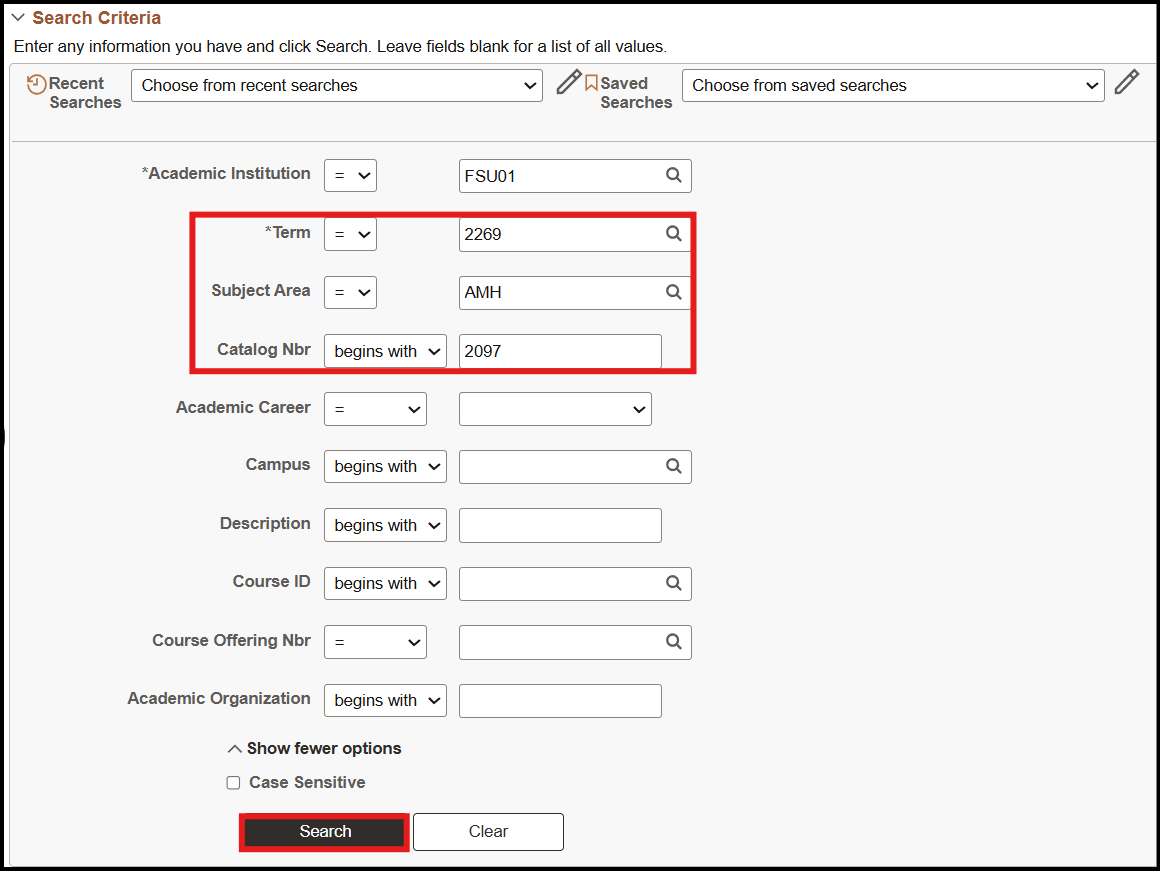
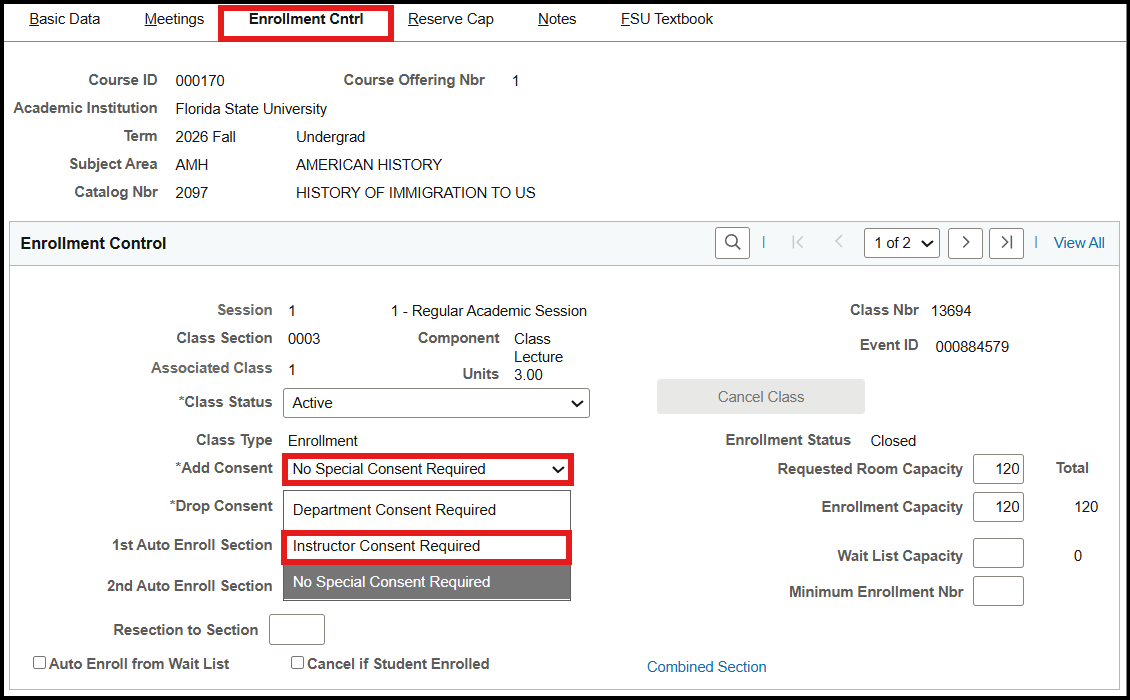
2. Click the Enrollment Cntrl tab, and in the Enrollment Control title bar use the arrows to navigate to the class section whose access you want to control.
3. In the Add Consent field, select either Department Consent Required or Instructor Consent Required. The example below shows Instructor Consent Required.
4. Navigate to: Curriculum Management > Class Permissions and search for the course for which you want to create permissions. The Class Permissions screen appears with the Permission to Add tab active.
Notes: 1) Ensure the correct class section is selected before proceeding. 2) In many cases, you should clear the pre-selected check boxes under the Permission Valid For area.
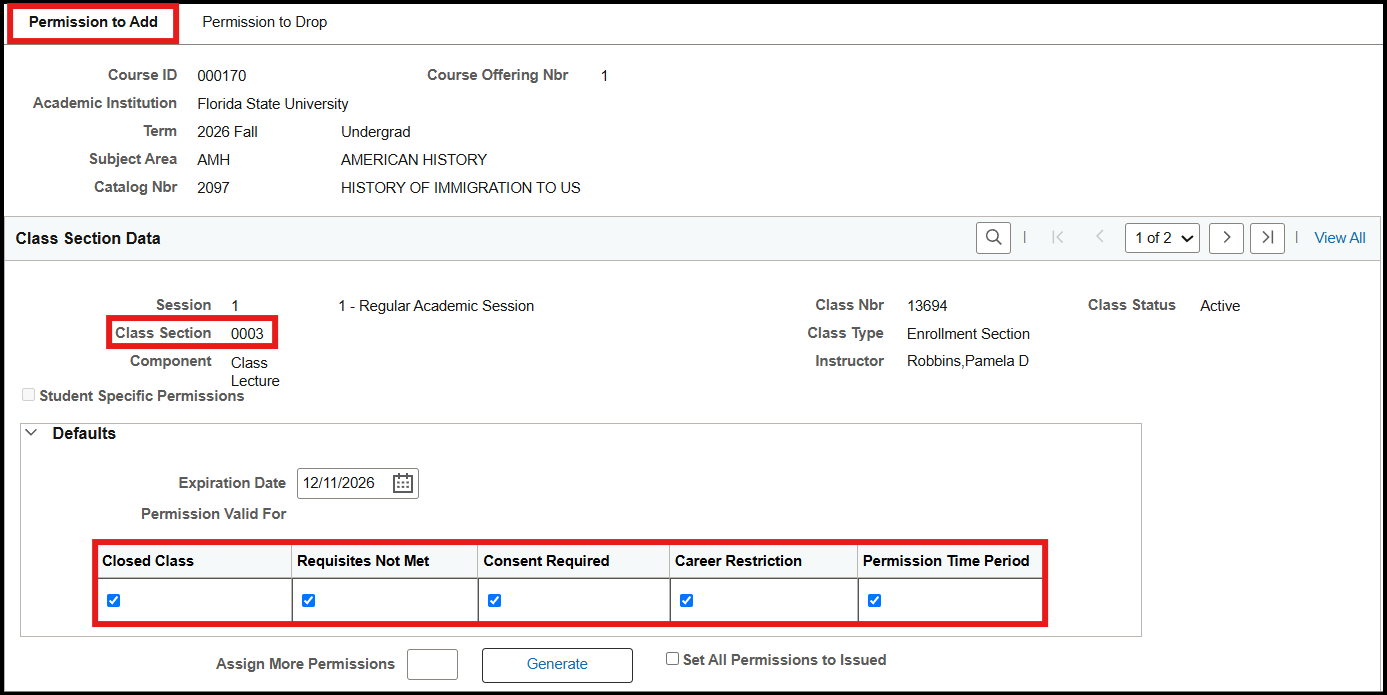
Note: In the Defaults area, the Expiration Date field defaults to the end-of-term date.
5. In the Assign More Permissions field, type the number of general permissions you want to generate for the class section and click the Generate button.
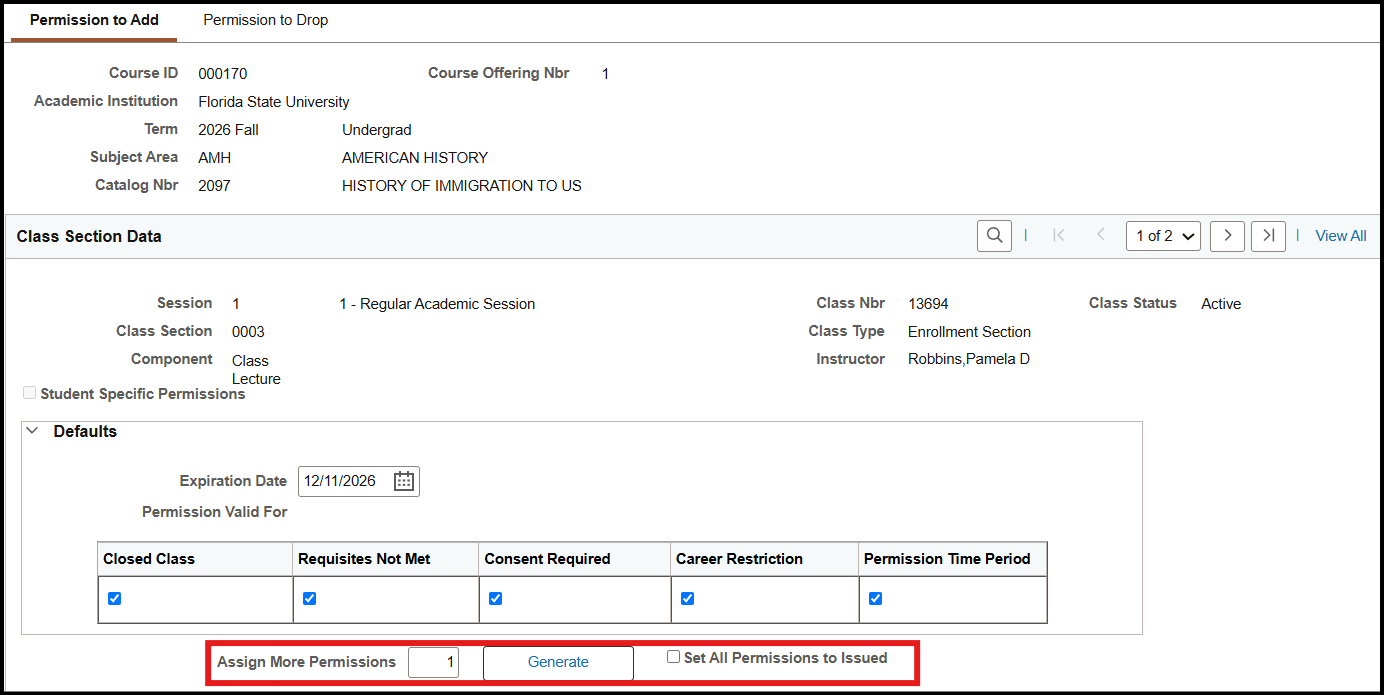
6. Each number may be used only once. If additional permission numbers are needed, type the quantity in the Assign More Permissions field and click the Generate button again.
Note: After you give a permission number to a student, in the Class Permission Data area under the General Info tab select the Issued check box. Click Save. This captures the issuer's identity and the time the number was issued.
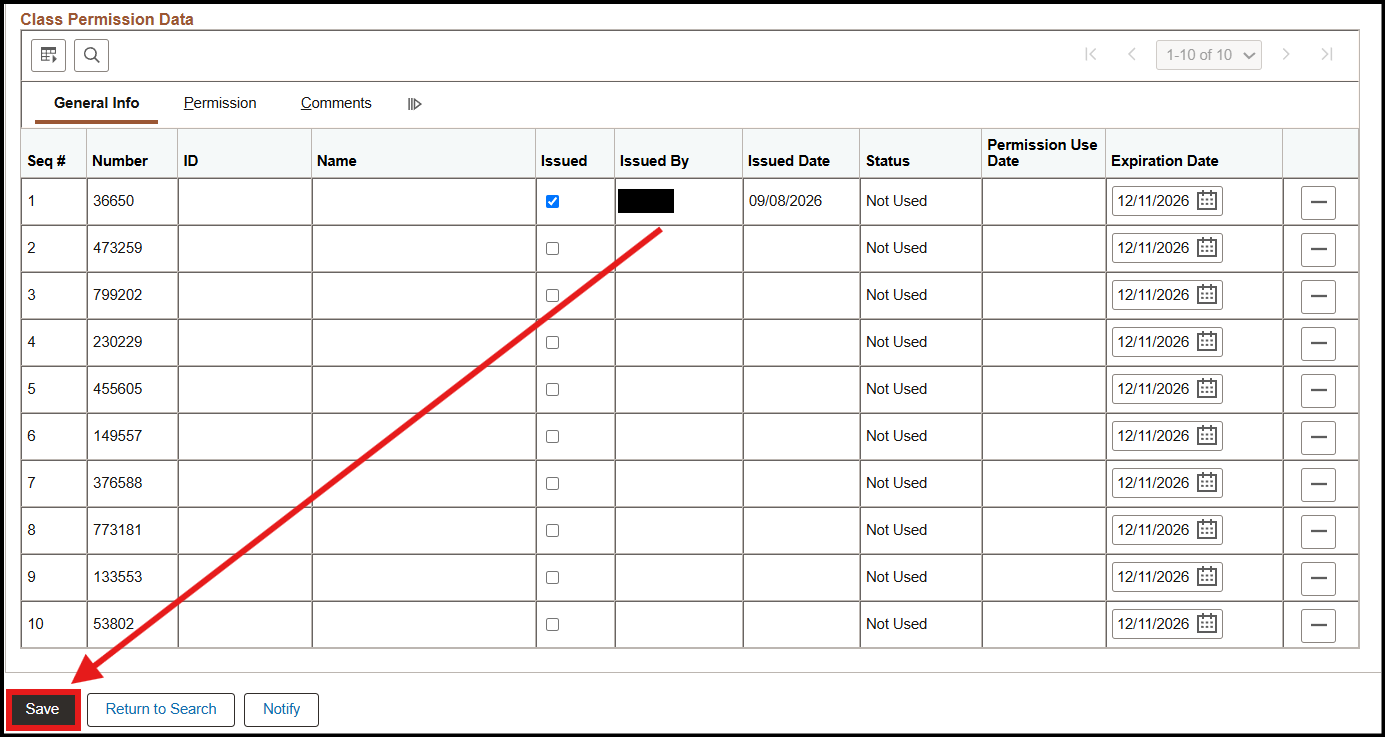
OR
If you have generated and issued multiple permission numbers, select the Set All Permissions to Issued check box and click Save.

What the Student Sees
When a student enrolls, he or she can get into an otherwise restricted class by entering the permission number in the Permission Nbr field.
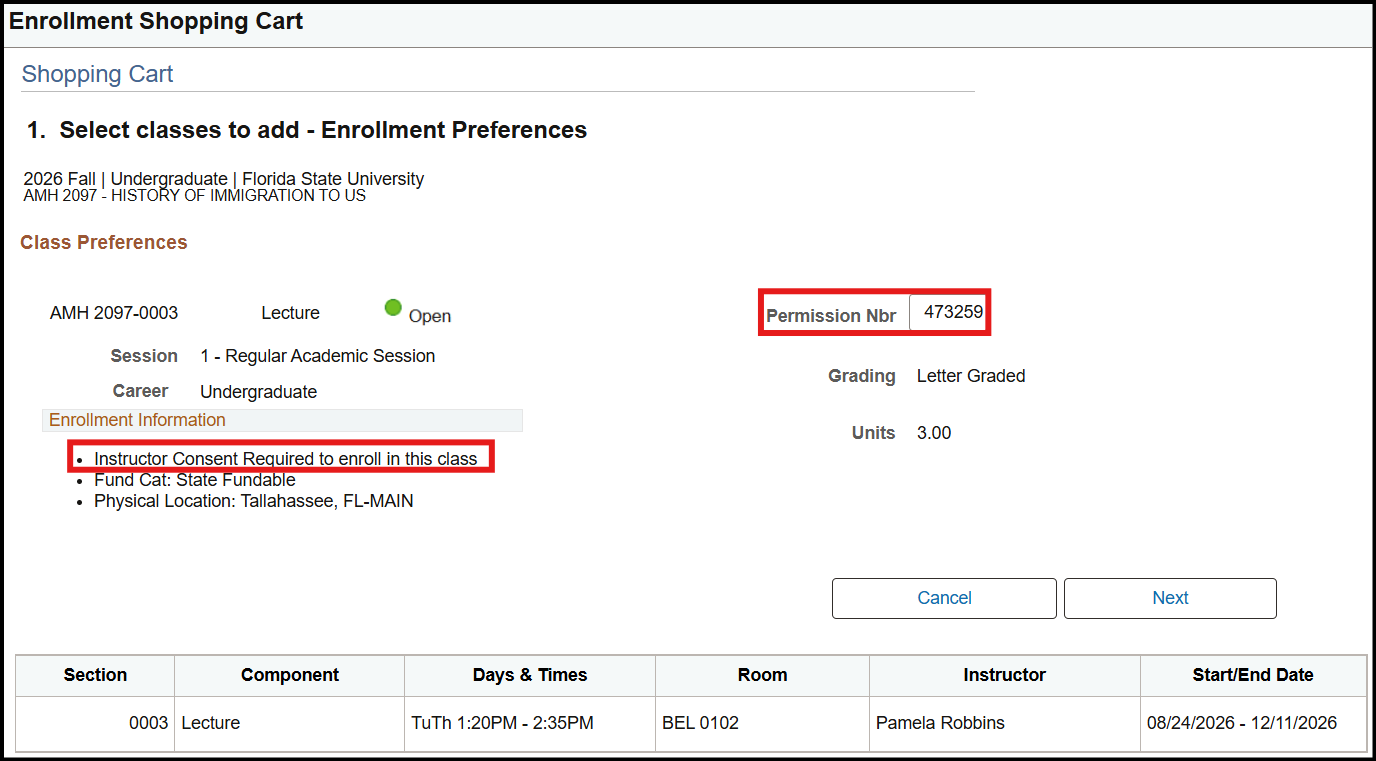
What Staff See When the Student Has Enrolled
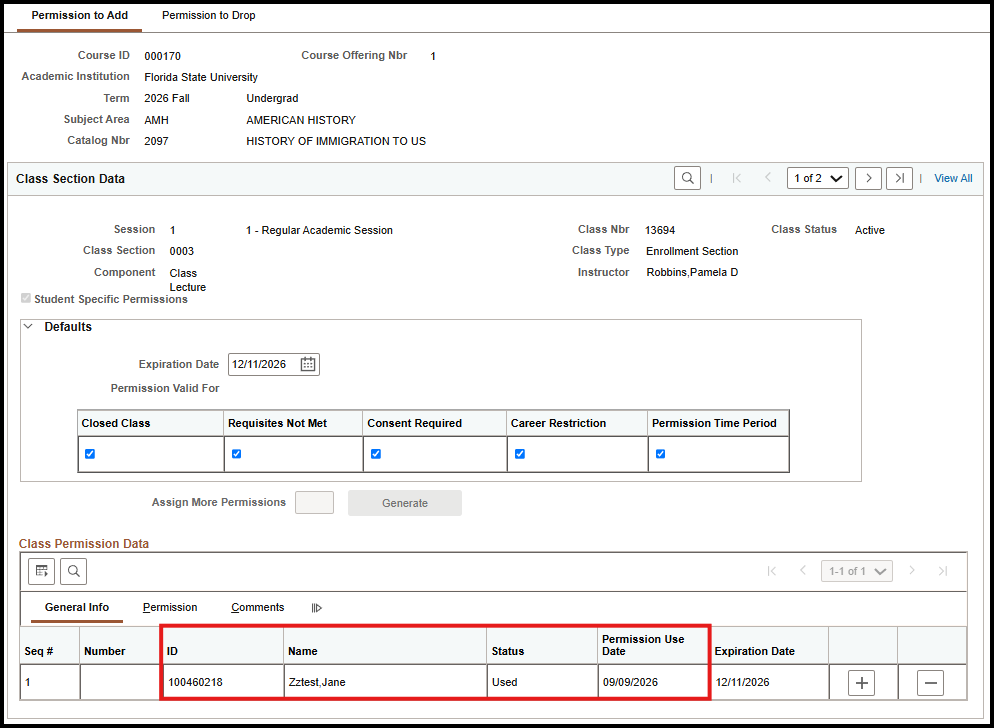
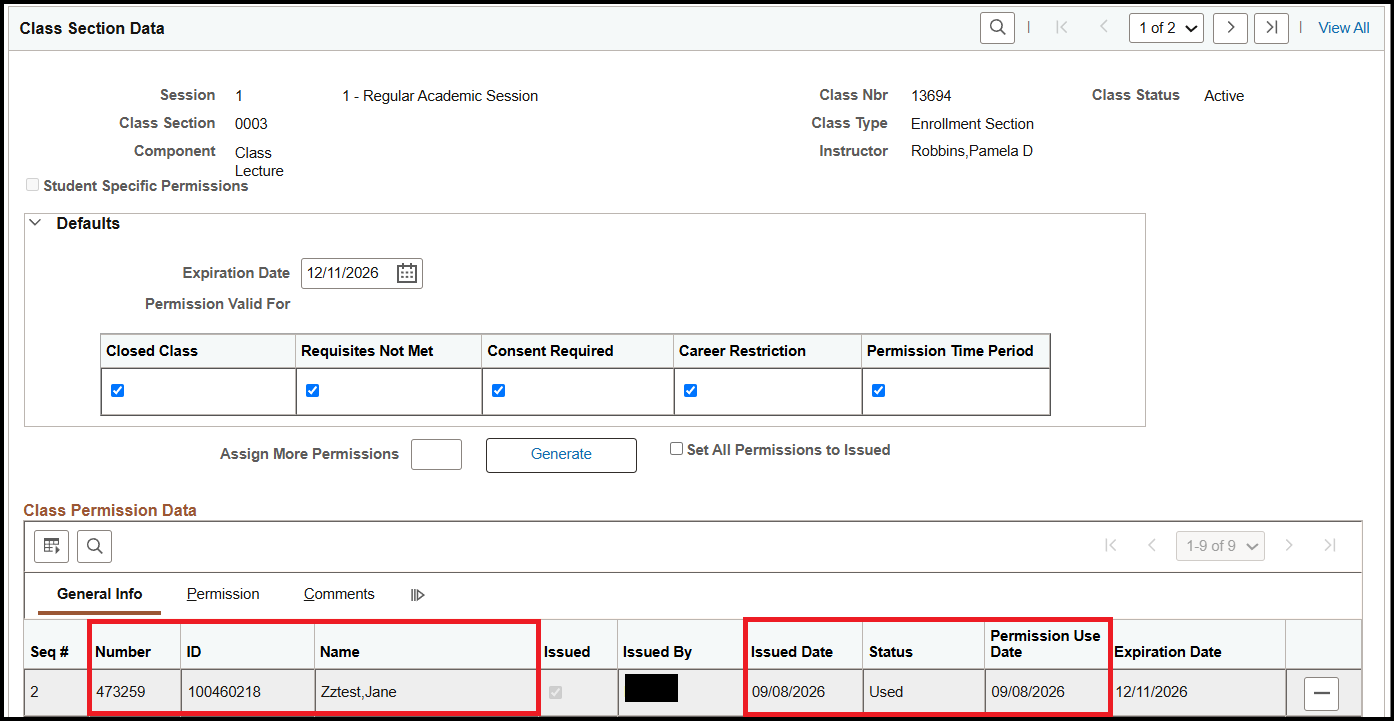
When the student successfully enrolls, the Permission to Add tab's Status field displays a value of Used. Values for the Permission Use Date, ID, Name, and Issued Date fields are captured and displayed, as well.
Student Specific Permissions
1. If you haven't already done so, navigate to Curriculum Management > Maintain Schedule of Classes and search for the class for which you want to add general student permission.
2. Click the Enrollment Cntrl tab, and in the Enrollment Control title bar use the arrows to navigate to the class section whose access you want to control.
3. In the Add Consent field, select either Department Consent Required or Instructor Consent Required.
4. Click the Basic Data tab and select the Student Specific Permissions check box.
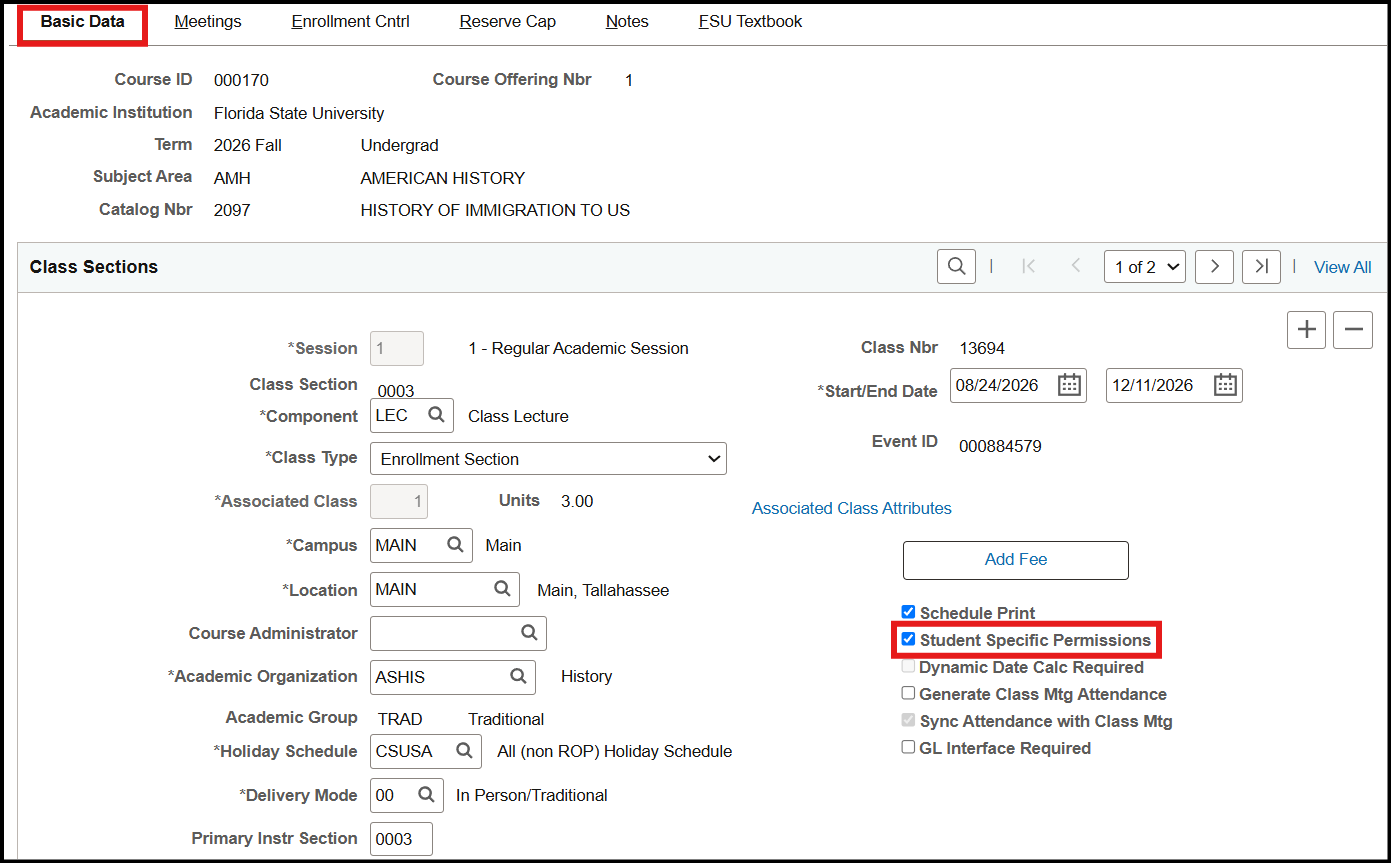
5. Navigate to: Curriculum Management > Class Permissions and search for the course for which you want to create permissions. The Class Permissions screen appears with the Permission to Add tab active.
Notes: 1) Ensure the correct class section is selected before proceeding. 2) In many cases, you should clear the pre-selected check boxes under the Permission Valid For area.
The Student Specific Permissions check box is selected because you chose it on the Basic Data tab. In the Defaults area, the Expiration Date field defaults to the end-of-term date, and the Permission Valid For values are all pre-selected. You may change any of these values.
Options on the Class Permission Data > General Info tab are now slightly different. The ID field now has a Look Up button to search.
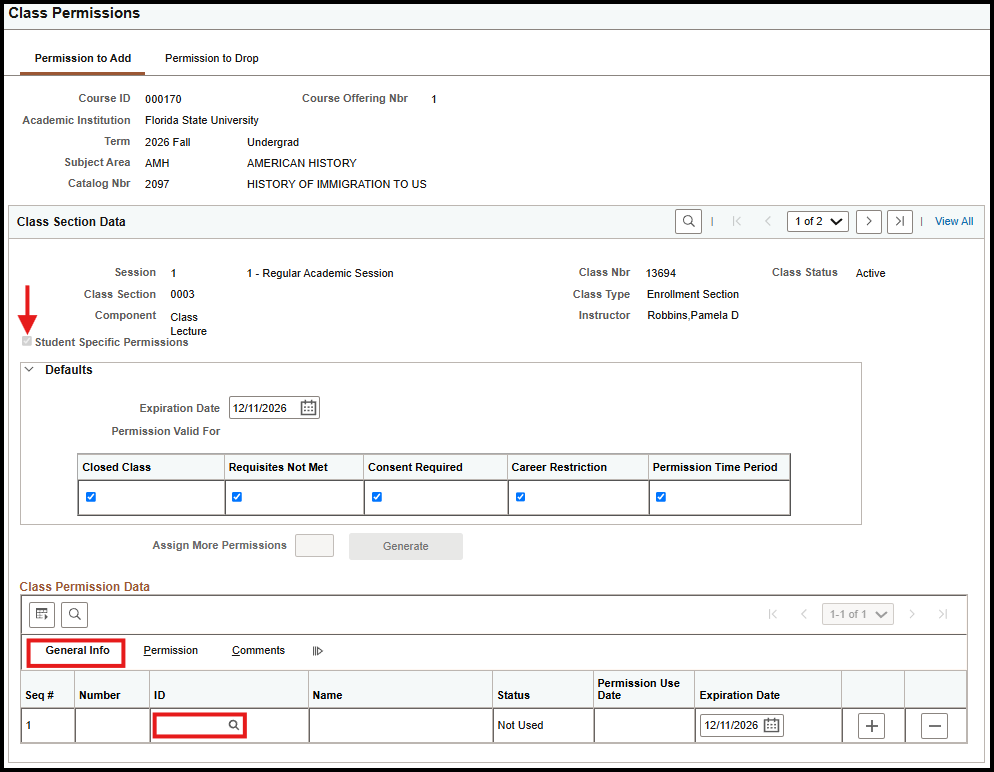
6. In the Class Permission Data area under the General Info tab, if you know the student's EmplID type it in the ID field. If not, click the Look Up button in the ID field to search for the student. After finding the right student, click Save. The student's name appears.

What the Student Sees
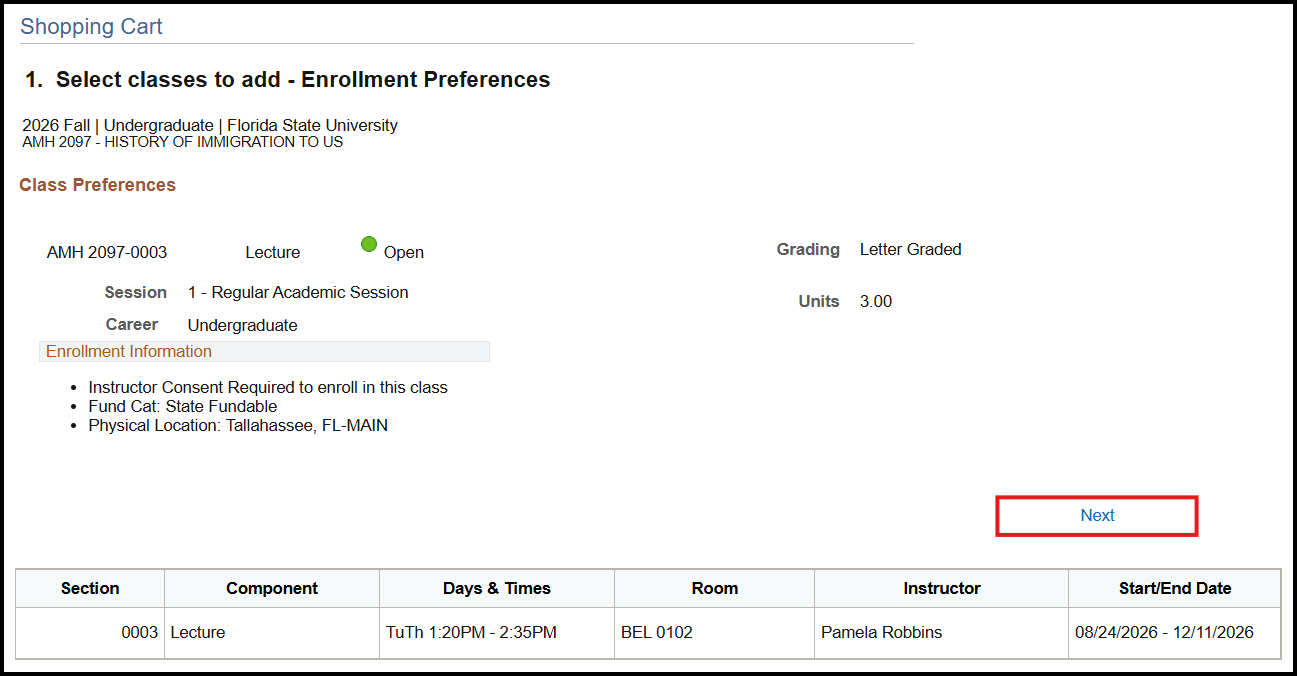
When issuing a student specific permission number, a permission number is NOT generated. The student's Empl ID is the permission number. As such, during enrollment the student does not enter a permission number to enroll in the class. The student simply clicks Next at this step of the enrollment process.
What Staff See When the Student Has Enrolled
When the student successfully enrolls, the Permission to Add tab's Status field displays a value of Used. Values for the Permission Use Date, ID, Name, and Issued Date fields are captured and displayed, as well.